
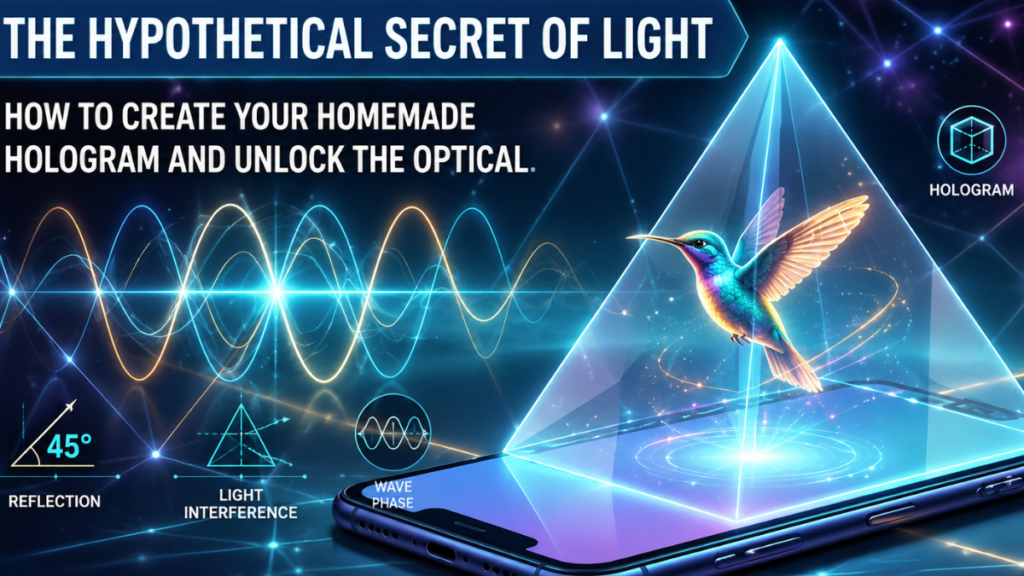
The ultimate guide to the science of light and the Pepper’s ghost effect. Learn step by step how to create a homemade hologram and discover the secrets of advanced optics explained in a simple and detailed way for everyone.
Sometimes we take for granted that we see things because they’re there, but the reality is much more poetic and technical at the same time. Our eyes are wave detectors. We don’t see objects directly in their physical essence; instead, our visual system interprets the streams of photons that bounce off surfaces and reach our retinas.
In the case of what we usually call homemade holograms, what we’re doing is skillfully manipulating that bounce to trick the brain. It’s fascinating to think that everything we perceive as solid is, at its core, a mental construction based on how light behaves when it hits matter.
Light has a dual behavior; it acts both like a particle and like a wave. For the effect we’re dealing with, we are interested in seeing it as a wave. Imagine throwing a stone into a calm pond. Those waves that spread out are very similar to how light propagates through space.
When these waves encounter an obstacle, like the plastic of a homemade pyramid, things happen that seem magical, but they actually follow unchangeable physical laws. The key to all of this is how we control those waves so that they project an image in a place where, physically, there is nothing but air.
Illustrative image created with AI assistance
The difference between reality and illusion in holography
A lot of people tend to lump any image that seems to float into the same category, but scientifically, there are nuances that are really important to know if we want to truly understand the science. In this post, I’m going to focus on the Pepper’s Ghost effect.
This name comes from John Henry Pepper, a scientist who popularized the effect in the 19th century for theatrical shows. Although visually the result looks a lot like what we see in spaceship movies, it’s not a hologram in the strict sense of the word. It’s based on a fundamental property of optics called partial reflection.
Partial reflection happens when light hits a material that is mostly transparent, like glass or certain plastics. Instead of letting all the light pass through, the material lets most of the light pass through while reflecting a small portion back. It’s exactly the same thing you experience when you’re on the subway or a train at night.
When you look out the window, you can see the dark landscape outside, but you also see your own reflection floating over the tracks. That reflection of you floating there is essentially the Pepper’s Ghost effect. In the video I’m going to show you, we take advantage of the fact that the phone screen emits a lot of light so that this reflection is much sharper and looks like a solid figure suspended in the center of the pyramid.
On the other hand, real holography is a much more advanced and complex discipline that requires the use of coherent laser light. The word hologram comes from Greek and means complete drawing. A normal photograph is flat because it only records the intensity of light, that is, how much light reaches the film at each point.
However, the real hologram also records the phase of the light wave. Going back to the pond example, the photo would tell you how high the wave is, but the hologram would tell you exactly at what point in the rising or falling cycle that wave is at every millimeter of the plate.
Once this information has been recorded, illuminating the plate with the same laser light reconstructs the object with real depth. If you move, you see the sides of the object as if it were there.
What we do with the phone is a very clever visual simulation that takes advantage of the way we process depth to give us a similar sensation.
| Key concept | Scientific explanation | Application in your project |
|---|---|---|
| Name of the effect | Pepper’s Ghost | It is the visual effect that makes floating images appear. |
| Physical principle | Partial reflection of light | The plastic reflects part of the phone’s light while letting the background light pass through. |
| Critical angle | Forty-five degrees (45°) | It redirects the light from the phone screen toward your eyes |
| Ideal material | Rigid, transparent polycarbonate | It provides a sharp reflection without distorting the image through curves. |
| The brain’s role | Accommodation and convergence conflict | The brain interprets depth where there is only reflected light. |
| Importance of the background | Absolute black, meaning absence of light | It prevents the plastic from reflecting unnecessary light, creating the illusion of empty space. |
| Piece geometry | Stepped trapezoid (1 cm x 3.5 cm x 6 cm) | It ensures the image lines up with the cross-shaped video projection. |
| Nature of light | Incoherent light from the phone vs. coherent light from a laser | It explains why the homemade version is a reflection, while the laboratory version is a real hologram. |
| Contrast factor | Dark environment and maximum brightness | It maximizes the visibility of the reflection against the transparency of the support. |
| Visual symmetry | Mirror inversion | The videos must be inverted so that, when reflected, they appear the right way around. |
The physics behind the forty-five degree angle
If you look closely at the plastic pyramid used in the video, you’ll see that the walls aren’t placed randomly. There’s a geometric reason why this invention works and leaves us amazed. The plastic is usually positioned at a forty-five degree angle relative to the device’s screen.
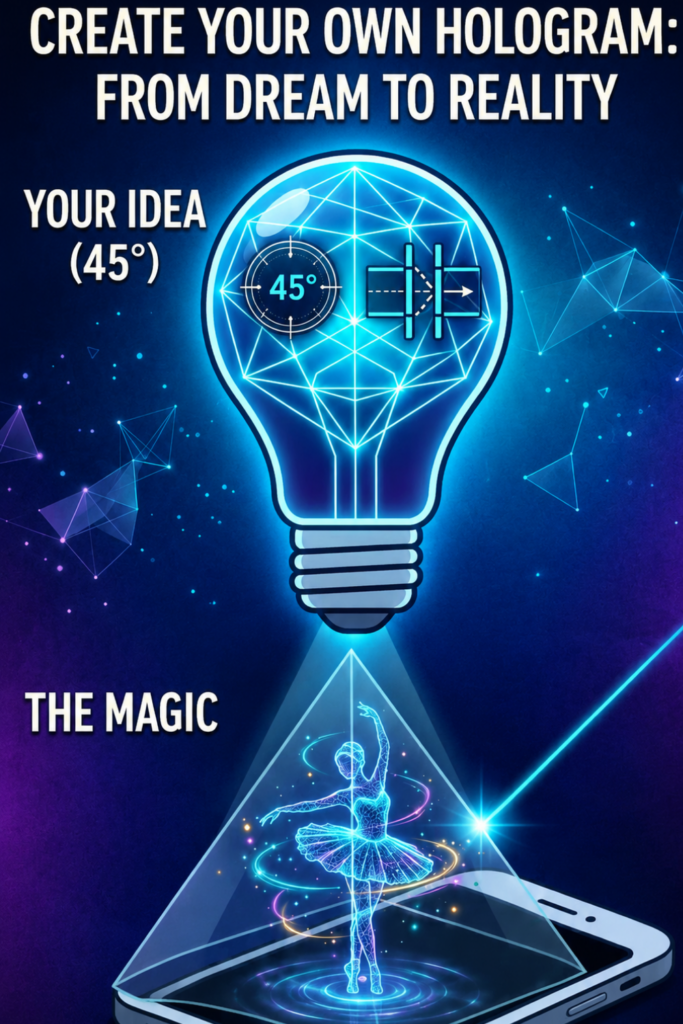
This isn’t an aesthetic whim, but a direct application of the law of reflection in geometric optics. This law tells us that the angle at which light hits a surface is exactly the same angle at which it reflects.
By tilting the plastic at forty-five degrees, we achieve something really special. The light shooting upwards from your phone screen hits the plastic and gets deflected horizontally toward your eyes.
Because of the way our brain interprets light, it thinks the rays are coming straight from behind the plastic, not that they’re bouncing up from below. That’s why, when you look at the pyramid, it feels like there’s a glowing figure right in the middle of the air. If the angle were different, say sixty or thirty degrees, the image would look distorted, or you’d have to bend down a lot to see the reflection.
Forty-five degrees is the sweet spot in physics for the projection to be perfect and comfortable for the viewer.
Also, this tilt allows the image to stay coherent. Since the pyramid has four sides, each one reflects one of the four images that are displayed on the phone screen. The brain receives information from multiple angles at once, which helps make the illusion of three-dimensionality much stronger.
It’s a mix of applied math in construction and how our vision is wired to make sense of three-dimensional space from two-dimensional stimuli.
Illustrative image created with AI assistance
The role of coherent light and interference
To dive even deeper into the technical side that underpins these technologies, we have to talk about a concept that physicists love: wave interference. As I’ve already mentioned, light behaves like a wave.
When two light waves meet at the same point in space, they don’t just pass by; they interact with each other. This effect is what allows us to create patterns of visual information that we can later decode. In the case of real holography, this is the fundamental cornerstone.
There are two types of interference.
Constructive interference happens when the crests of two waves line up and add together, creating a much brighter spot of light. On the other hand, destructive interference occurs when the crest of one wave lines up with the trough of another, canceling each other out and creating darkness.
In a lab, when a real hologram is recorded, a complex map of these bright and dark points is created on a photosensitive plate. That map doesn’t look anything like the original object; it looks like a bunch of random spots and noise. However, all the information about the object’s volume is stored in that chaos of interferences.
In the experiment in the video, we didn’t end up using interference because we’re not using laser light, but we did play with contrast and overlapping planes.
By working in a dimly lit room, we eliminate background visual noise. The brain, not having other clear references of where the space begins and ends, focuses exclusively on the strongest stimulus, which is the reflection from the phone. It’s a way of prioritizing the signal over the noise.
The science behind this isn’t just pure optical physics, but also a very important part of human perception psychology. We trick the eye because it’s designed to save energy and constantly take interpretive shortcuts.
Detailed Guide to Creating a Homemade Hologram
If watching the video made you want to try it yourself, I can assure you that it’s one of the most rewarding experiences you can have on a free afternoon. You don’t need to spend money on high-end technology because physics works just as well with materials you probably already have in some kitchen drawer or in the storage room.
The goal is to create a structure that’s transparent enough to let background light through, but dense enough to retain the screen’s reflection.
The go-to material for this is usually the plastic from old CD cases, the ones we used to call jewel cases. It’s a very rigid polycarbonate with excellent optical transparency. If you don’t have any on hand, you can use the rigid plastic that comes in the packaging of many tech products or toys.
The important thing is that it’s not one of those flexible plastics that bend at the slightest touch, because we need the faces of our pyramid to be perfectly flat. If the plastic is a bit warped, the image will look like one of those distorted funhouse mirrors: warped and unclear.
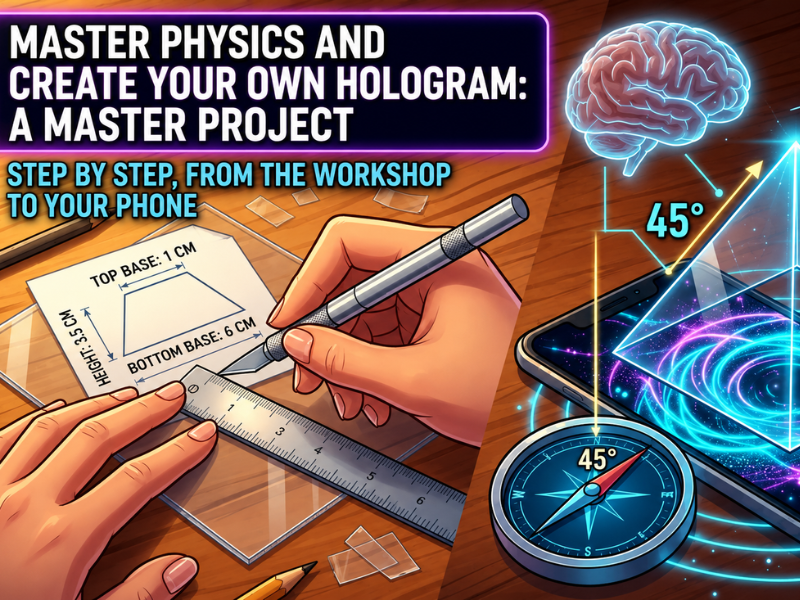
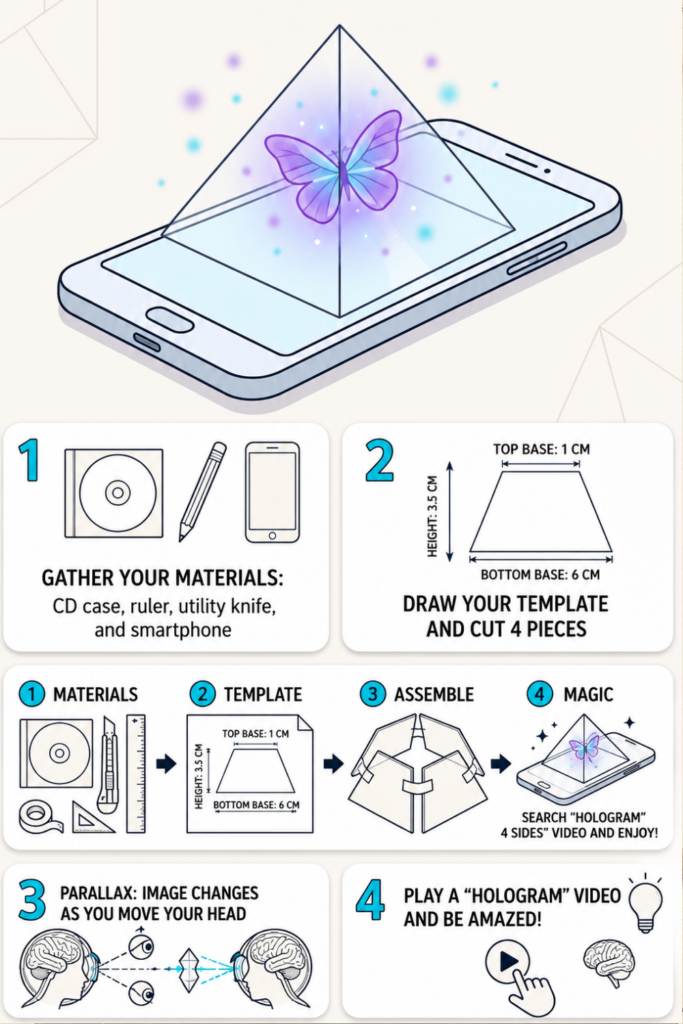
To start, ideally you should make a template on graph paper so you don’t get the proportions wrong. Geometry is your best friend in this step. You need to draw a trapezoid with very specific measurements: the top base should be one centimeter, the height three and a half centimeters, and the bottom base six centimeters.
These measurements are designed for a standard-sized mobile phone. If you wanted to make it for a larger tablet, you would just have to multiply all the measurements by two or three, always keeping the proportion. Once you have your paper template, cut it out and use it as a guide to mark the plastic.
The cutting part is where you need the most patience. With a well-sharpened cutter and a metal ruler to stay on track, you gently run the blade over the same line several times. Don’t try to cut through the plastic in one go because it might splinter or you could cut yourself. It’s better to make several passes with light pressure.
Once you have the four trapezoids cut out, it’s time for the moment of truth: the assembly. You need to join the sides of the trapezoids with a little bit of transparent tape or glue. My advice is to put the tape only on the outside so it doesn’t interfere with the internal reflection of the light. In the end, you should have something like a pyramid with the tip cut off that stands on its own.
I’ll leave you the step-by-step on YouTube. This is the video I mentioned
The importance of the environment and image quality
Once you have your pyramid ready, it’s not enough to just put it over any video. For the science of partial reflection to work spectacularly, you need to set the stage. The biggest enemy of a homemade hologram is ambient light.
If you’re in a very bright room, photons from the sun or ceiling lamps will pass through the plastic and cancel out the weak reflection coming from your phone. That’s why the first step is to lower the blinds or turn off the lights. In the dark, the contrast increases exponentially, and that’s when the image seems to come to life on its own.
Cleaning the plastic is another factor that nobody usually mentions but that completely changes the experience. Any fingerprint, speck of dust, or scratch on the material will act as a point of light dispersion. Instead of the light passing through or bouncing cleanly, it will hit the dirt and create a whitish glare that gives away the presence of the plastic.
We want the plastic to be invisible, to make it seem like there’s nothing between your eyes and the image. A little glass cleaner and a microfiber cloth work wonders to make the illusion perfect.
Also, your device brightness should be set to the maximum level. Remember that only a small fraction of the screen’s light reflects back to you, while most of it is lost passing through the plastic toward the ceiling. If the brightness is low, the reflection will be so faint that you’ll barely notice it.
It’s also crucial to place the pyramid exactly in the center of the four images in the video. These special videos are designed so that each of the four figures is a different perspective of the same object: front, back, and sides. If you place it wrong, the images will overlap and you’ll see a light blur instead of a defined figure.
Illustrative image created with AI assistance
Why the Brain Falls for the Trick: The Psychology of Perception in the Homemade Hologram
What I like most about this topic is that it’s not just about physics, but about who we are on the inside. The human brain is an interpreting machine that has been evolving for thousands of years to survive, not to see absolute truth.
One of the ways we understand the world is through depth cues. When we see something, our brain analyzes shadows, relative sizes, and the way objects move in relation to each other.
In the case of the homemade hologram, we’re bombarding the brain with conflicting cues, and it chooses the one it likes best. On one hand, we know the plastic is there because we put it ourselves, but on the other, the eye receives a sharp image that seems to be physically behind that surface.
Since it’s a shiny object with its own movement, the visual system gives it priority importance. Also, because the background is black and the plastic is transparent, there’s no visual cue telling the brain that the image is flat.
There is a phenomenon called parallax that is key here. When you move your head a little to the sides, the image reflected in the plastic also slightly changes its relative position compared to what’s behind it. That small change is what the brain interprets as real depth.
It’s the same reason why clouds seem to move slower than trees when you’re driving. By simulating this behavior with the reflection, we’re basically hacking our mind’s data processing system, forcing it to see volume where there’s only bounced light.
The historical evolution from theater to augmented reality
It’s funny to think that this technology that seems so modern to us has its roots in the smoke-filled theaters of Victorian London. John Henry Pepper wasn’t the original inventor— that credit usually goes to Henry Dircks— but Pepper was the one who figured out how to turn it into a mass spectacle.
At that time, they used huge glass panels and actors hidden in a pit under the stage. By lighting the actor with a very strong light, their reflection appeared on the glass on stage, allowing the real actors to ‘pass through’ the ghost.
Nowadays, we’ve refined that technique to incredible levels. What you see in the video is the miniaturized version of what is used in big concerts to “bring back” music legends.
They use almost invisible metal meshes or high-tech plastics with coatings that enhance reflection without losing transparency. But the scientific basis is exactly the same as that of the homemade hologram. The physics hasn’t changed, we’ve just improved our ability to make more precise materials and screens with resolutions the eye can’t tell apart from reality.
Even the augmented reality we use on our phones today draws from these principles. When you see a Pokémon on the street through your phone’s screen, you’re using a digital version of this trick.
The device combines the real camera image with a computer-generated image, making sure the perspectives match so it looks like the object is really there. In the end, it all boils down to the same thing: understanding how we receive light and how we can insert new information into that constant stream of data coming to our senses.
The nature of coherent light and the mystery of the laser
To talk about real holograms, the kind you see in laboratories or in research movies, we have to inevitably mention the laser. The light coming from your phone screen is incoherent light.
This means that the photons shoot off in all directions and with different wavelengths, like a crowd of people leaving a soccer stadium, each going at their own pace and heading home.
However, laser light is coherent. It’s like an army marching in perfect formation: all the soldiers step at the same time, with the same stride and in the same direction.
This coherence is crucial for real holography because it allows the phases of the waves to stay constant. When a laser beam is split into two, one hits the object and the other goes straight to the plate. When they come back together, they create that interference pattern we were talking about earlier.
Without that perfect laser synchrony, the interference pattern would disappear instantly and we wouldn’t be able to record the depth information. It’s fascinating to think that, to capture the volume of an object on a flat surface, we need the light to behave as orderly as possible.
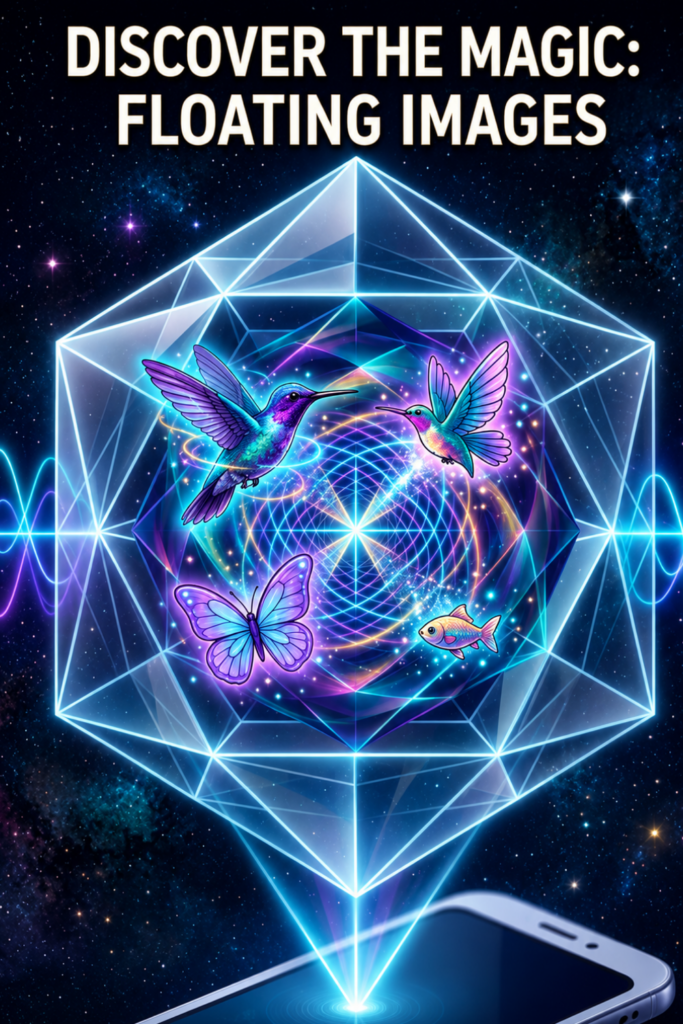
Illustrative image created with AI assistance
The phenomenon of diffraction and how we reconstruct the image
When we already have that interference pattern recorded on a plate, another beautiful physical effect comes into play: diffraction. Diffraction happens when a light wave encounters an obstacle or a slit that is similar in size to its wavelength.
At that moment, the light doesn’t just pass straight through; it bends and spreads out, as if every point on the slit became a new source of light.
In a real hologram, the pattern of spots and stripes etched onto the plate acts like an incredibly complex diffraction grating. When you shine a beam of light similar to the one that created it onto that plate, the light diffracts as it passes through those millions of micro-obstacles.
When going out the other side, the waves recombine in such a way that they exactly recreate the wave fronts that originally came from the real object. That’s why, when you look through the plate, you don’t see a blur, but you see the object floating with absolute clarity.
It’s like the plate is a magic window that has memorized how the light passed through it at a certain moment in the past.
Applications of holography beyond entertainment
Although what we see in the video is really fun and visually appealing, the science of holograms has applications that are changing the world in ways you can’t even imagine.
For example, in medicine, digital holography is being used to create three-dimensional representations of internal organs from MRI or CT scans.
This allows surgeons to study a heart or a tumor from every possible angle before making the first incision, which increases precision and drastically reduces risks.
It’s also essential in the world of security. If you take out a euro bill from your wallet right now or look at your credit card, you’ll see a small sticker that shines and changes color when you move it.
That’s a security hologram. They’re extremely hard to counterfeit because they require nanometer-level precision to be engraved.
They’re not just simple ink prints, but physical structures that manipulate light. Next time you pay for your coffee, think that you’re holding in your hand one of the most practical applications of quantum physics and optical engineering.
The challenge of holograms outdoors
A common question is why we still don’t have holograms like the ones in movies right in the middle of the street. The technical problem is that light needs something to bounce off of so our eyes can see it.
In a vacuum or clean air, a beam of light is invisible unless it hits your eye directly. That’s why in the video we use plastic: we need a surface that stops some of the light and directs it toward us.
To get holograms in the air without physical supports, science is exploring some really wild paths. One of them is using femtosecond lasers. These lasers are so powerful and fast that they can knock electrons off air molecules like nitrogen and oxygen, creating tiny plasma points that emit light.
By moving that plasma point at very high speed, you can draw shapes in the air. It’s a noisy technology, because every plasma spark sounds like a little pop, and for now, they are very small images, but it’s the closest way we have to see a princess asking for help in the middle of our living room.
How display technology affects our eye health
It’s important that we also talk about how these systems interact with our health. When looking at these homemade holograms or any screen, we are forcing what’s called visual accommodation. Normally, when we look at something up close, our eyes converge and the lens curves to focus.
With holograms, sometimes a conflict occurs: your eyes focus on the surface of the plastic, but your brain tries to focus on the image that seems to be farther back.
This extra effort can cause eye strain if we spend a lot of time playing with these devices. That’s why I always recommend enjoying these illusions in moderation and making sure the image is as sharp as possible.
The blurrier the projection, the more work the brain has to do to try to make sense of it, and the sooner fatigue will set in. The science of vision is a delicate balance between what’s out there and how we process it inside.
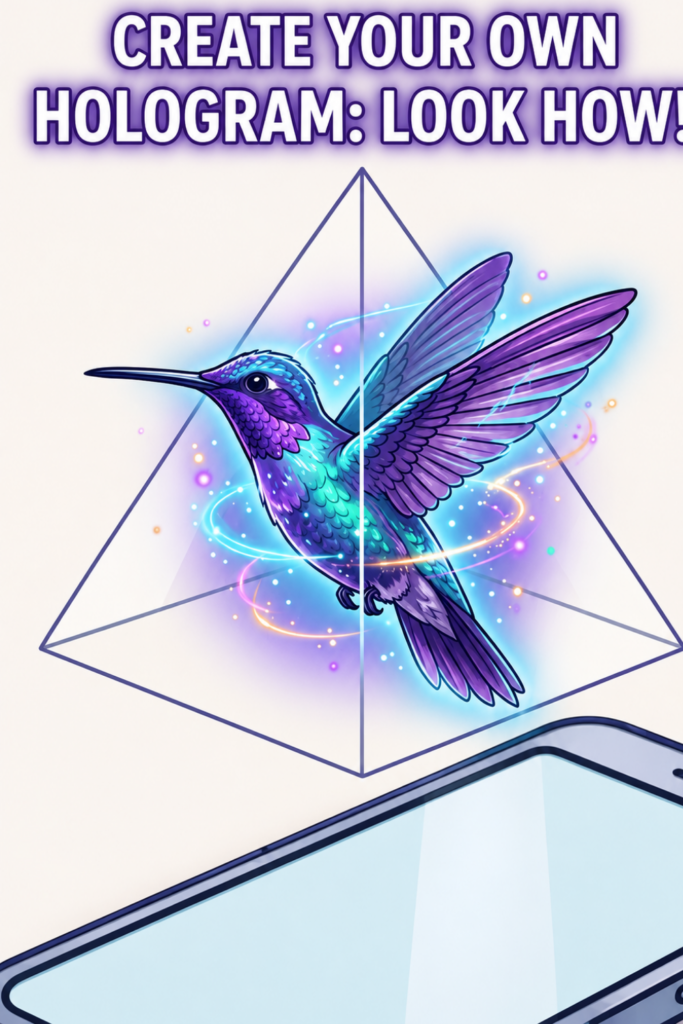
Illustrative image created with AI assistance
The Masters of Light: From the Camera Obscura to Modern Holography
The story of how we’ve learned to manipulate images is a tale spanning centuries. It all started with the camera obscura, a principle already known to the ancient Greeks and used by artists like Da Vinci to understand perspective.
Basically, it consists of an enclosed space with a small hole through which light enters, projecting an inverted image of what’s outside onto the opposite wall. This is the direct ancestor of your home projector. What we do with the pyramid is, essentially, flip this concept: we use an internal light source to project an image outward.
In the nineteenth century, scientists like Thomas Young showed with the double-slit experiment that light behaved like a wave. This discovery was what allowed us to understand the interference patterns we were talking about earlier.
Without Young, we wouldn’t understand why reflections on plastic look one way or another depending on the angle. Later on, Dennis Gabor came along, a Hungarian engineer who in 1947 invented holography while trying to improve the resolution of electron microscopes.
For this invention, he received the Nobel Prize in Physics, although he had to wait until the invention of the laser in the 1960s for his idea to become a practical reality.
Gabor understood that the information of an object doesn’t just lie in the light it emits, but in how that light relates to the rest of the environment. This is what we call spatial and temporal coherence.
When you build your pyramid, you are applying, even in a simplified way, the legacy of all these geniuses who spent years locked up in dark labs trying to understand why a ray of light bends when it passes through a crystal.
Perfecting the technique: Expert tricks for a professional finish on your homemade hologram
If you’ve already done your first test and want to take the experiment to the next level, there are several technical adjustments you can make. One of the most common problems is the so-called double ghost effect. This happens because the plastic has two sides, the inside and the outside, and each one creates its own reflection.
If the plastic is very thick, you’ll see two slightly shifted images, which makes the hologram look blurry.
The scientific solution is to use a plastic that is as thin as possible while keeping its rigidity, or even apply a window tint film on one side to enhance one of the reflections and cancel out the other.
Another key aspect is controlling diffraction at the edges. When you cut the plastic, the edges usually end up rough or whitish. Those edges act like tiny sources of scattered light that break the illusion of the image floating in midair.
A very effective trick is to paint the edges of the trapezoid with a black permanent marker. This absorbs side light and makes the boundaries of the structure disappear into the darkness of the room.
That way, the eye only receives information from the central reflection and doesn’t get distracted by the physical structure that supports it.
Also, if you want the image to really look solid, you should adjust the color range on your phone. Cool colors like blue or green tend to reflect more sharply on plastic materials than warm colors like red. This is due to the wavelength of each color.
Shorter wavelengths (blue) interact differently with the molecular structure of polycarbonate, often giving a reflection that we perceive as brighter and more defined.
Try looking for videos of jellyfish or blue digital particles and you’ll see how the depth seems to magically increase.
The conflict of accommodation and visual convergence
Here we enter a field that I find fascinating: the neuroscience of vision. Why is it that sometimes, after looking at a hologram for a while, we feel a bit dizzy or tired?
Science explains this through the conflict between accommodation and convergence. When we look at a real object, our eyes do two things at the same time: they converge (turn inward to point at the object) and accommodate (the lens changes shape to focus at the exact distance).
In a homemade hologram, your brain gets a convergence signal that tells it the object is ten centimeters from your eyes, inside the pyramid. But the accommodation signal tells it that the real light source (the phone’s pixels) is fifteen centimeters away.
That small five-centimeter mismatch forces the brain to work overtime to process the image. It’s the same reason why some people get dizzy with 3D movies or virtual reality glasses.
Knowing this limit of our biology helps us design better visual systems that are more respectful of our eye health.
Optics in nature: Natural holograms
Don’t think that the manipulation of light is something exclusive to humans. Nature is the original master of optics. Think of the wings of a Morpho butterfly or the feathers of a peacock.
Those vibrant, changing colors aren’t due to chemical pigments, but to something called structural coloration. It’s basically a form of natural holography.
The scales on the wings have nanometer-scale structures that interfere with light, reflecting only certain wavelengths and canceling out others.
When you move your pyramid and see how the image changes, you’re imitating the same physical process that a butterfly uses to attract its mate or to camouflage itself.
The science behind the video is actually connected to some of the fundamental principles that shape the beauty of the natural world. Understanding reflection and interference is like learning to read the language in which the universe is written.
It’s amazing how a small experiment in the living room can connect you to principles that work in the most distant galaxies and in the tiniest creatures on our planet.
The mathematics of proportions and the scale of the simulation
For the effect you see in the video to be perfect, we can’t just cut the plastic by eye. The science of geometric optics tells us that the relationship between the size of the screen and the size of the pyramid has to stay constant.
If you notice, the top base of the trapezoid doesn’t close completely; it leaves a small open square. This is crucial because that space acts as the vanishing point for our image.
If we closed the pyramid at the top, the upper part of the image would get cut off and we would lose the feeling that the object is complete.
The ideal proportions mentioned earlier — 1 cm, 3.5 cm, and 6 cm — are not random. It responds to the need for the plastic face to exactly cover the projection area of the video on the phone.
If the pyramid is too small, you’ll only see a piece of the image. If it’s too big, the reflection will be very diluted and lose intensity.
It’s a balance of light densities. In the end, what we’re doing is concentrating the photons emitted by the phone into a very specific volumetric space so that the light density is enough to trick your retina.
Quantum light and the future of holographic communication
If we go a little deeper and look to the future, we have to talk about quantum optics. Right now, scientists are working on something called metasurfaces.
These are materials designed atom by atom that can bend light in ways that don’t exist in nature.
This would allow creating holograms without the need for plastic pyramids or dark rooms. Imagine if the screen of your next phone had an invisible layer of these materials that could project light directly into the air and create a stable image in broad daylight.
This technology is based on controlling the phase of light at a scale smaller than the wavelength itself. In other words, we’re manipulating light at its most intimate level.
This won’t just be for watching 3D kitten videos—it will revolutionize the way we communicate.
We will be able to have video calls where the other person is sitting next to us virtually, with a physical presence so real that the brain will barely notice the difference.
The video technology you liked is the first step, the coziest and most homemade, on a staircase that leads us straight to a future where the distinction between what’s real and what’s projected will be almost nonexistent.
The phenomenon of total internal reflection
Another concept that explains why plastic works so well is total internal reflection. Even though in the pyramid we want the light to come out toward your eyes, some of that light gets trapped inside the walls of the plastic, traveling through it like an optical fiber.
This is what sometimes makes the edges of the pyramid shine.
If the plastic is good quality and has a high refractive index, the light stays more concentrated and the reflection is stronger.
The refractive index is simply a measure of how much light slows down when it enters a material. In the air, light travels at almost three hundred thousand kilometers per second, but when it enters plastic, it slows down a bit. That slowdown is what makes the beam bend.
It’s like when you’re driving and a wheel hits a puddle: the car tends to turn that way. Light does the same thing. By understanding this slowdown, we can calculate with millimeter precision where the floating image will appear.
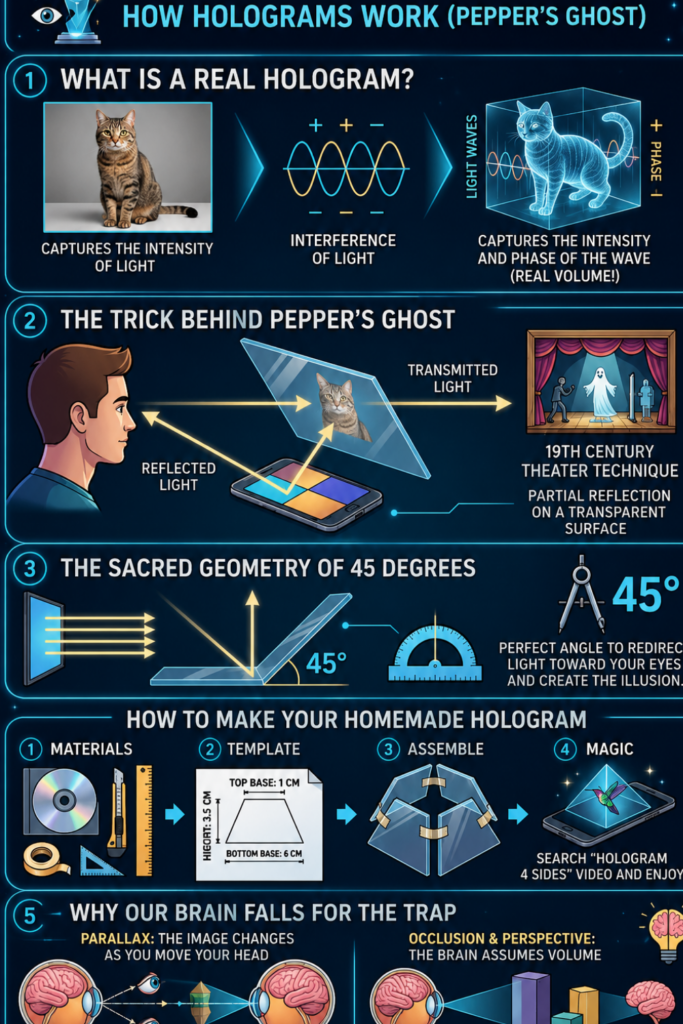
Illustrative image created with AI assistance
Frequently asked questions about making a homemade hologram
Why does my hologram look upside down or inverted?
This usually happens because the video you’re using isn’t set up correctly for the reflection. Since we’re using a mirror (the plastic one), the image gets flipped. Videos made for this already come pre-flipped so that when they reflect, you see it in the right orientation. It’s a symmetry game that the video creator needs to consider.
Can you make a hologram of a real person with this method?
Yes, of course. You just need to record the person against a completely black background from four different angles: front, back, and both sides.
Then, you put those four videos together in a cross composition, and that’s it. When you place your pyramid, you’ll see that person in miniature floating on your phone. It’s a beautiful way to feel close to someone who is far away.
Does the color of the plastic affect the final result?
Absolutely. If you use a plastic with a slight blue tint, the image will look more technological and futuristic, but you’ll lose fidelity in the red colors. If the plastic is a bit yellowish (like the kind that gets old from the sun), the image will look dirty. The ideal is totally clear polycarbonate so the colors you see are the same as what your device’s screen emits.
Is it dangerous to look at these lights up close?
No more than just looking at your phone screen normally. After all, it’s reflected light. That said, as I mentioned before, try not to strain your eyes for hours on end to avoid visual fatigue from the accommodation conflict. Like everything in life, the key is balance.
How to make a homemade hologram projector for your phone. Learn how to make a partial reflection pyramid to turn any video from your smartphone into a floating three-dimensional image. It’s a simple optics project but with spectacular results.
Total Time: 15 minutes
Draw the geometric template
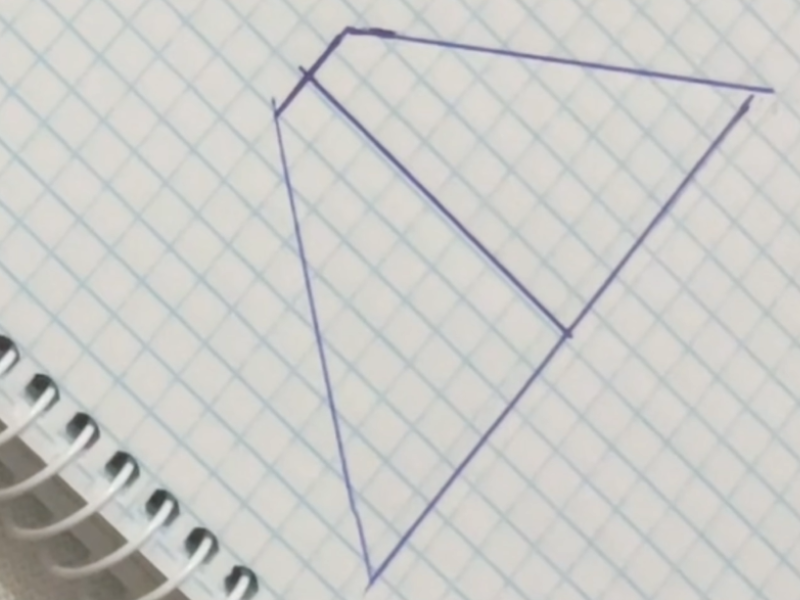
The first thing you should do is draw a trapezoid on a piece of paper. The exact measurements for the optics to work on a standard phone are: a top base of 1 cm, a height of 3.5 cm, and a bottom base of 6 cm. Make sure it’s symmetrical so the pyramid doesn’t end up crooked.
Cut the plastic pieces
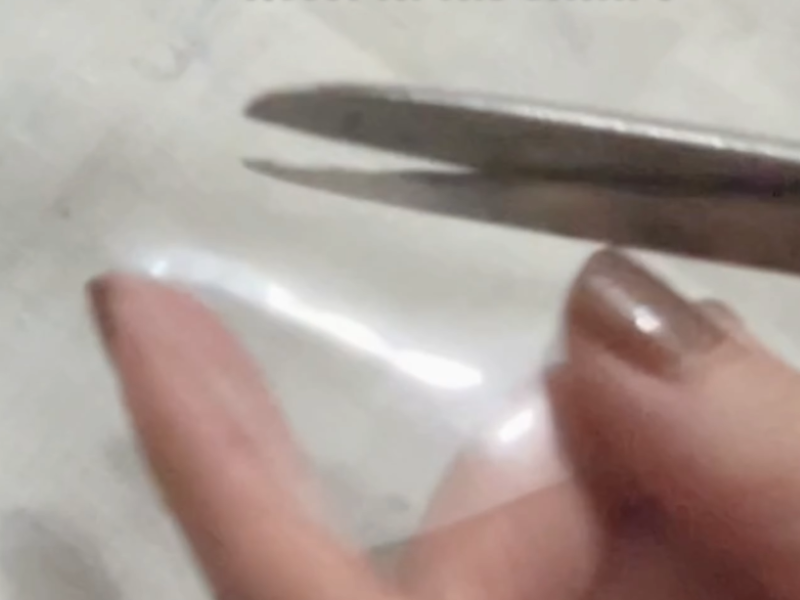
Place the paper template on the rigid plastic. Using a ruler and the cutter, cut out four identical pieces. It’s recommended to make several gentle passes with the cutter instead of trying to cut through the plastic all at once to avoid it cracking or breaking unevenly.
Join the faces of the pyramid
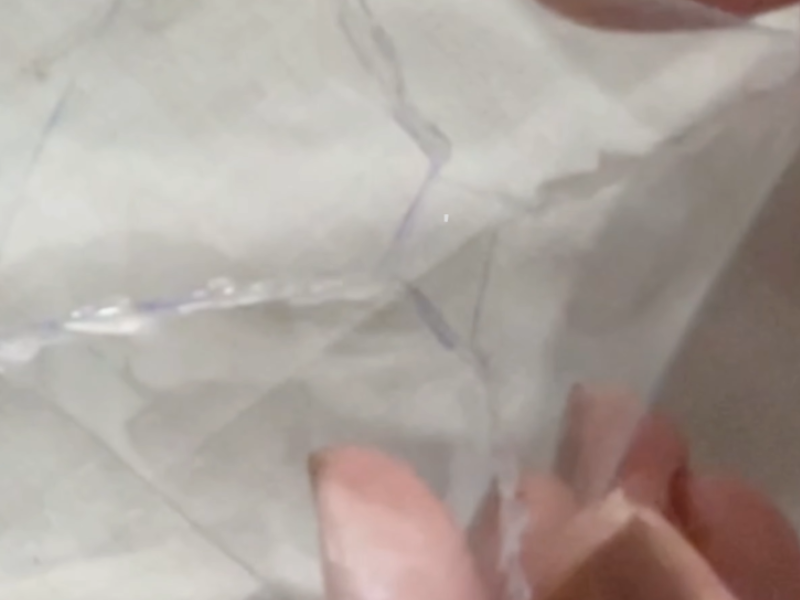
Arrange the four pieces to form a truncated pyramid (with the small opening at the bottom). Tape the sides with small pieces of clear adhesive tape. Try to keep the tape on the outside and stretched tight so it doesn’t block the light or create weird reflections.
Get the device and the environment ready
Clean the plastic surfaces well to remove fingerprints or dust. Turn your phone’s brightness all the way up and look for videos on YouTube using the keywords ‘hologram video 4 sides.’ Turn off the room lights so the contrast is higher and the partial reflection is sharper.
Start the 3D projection
Place the pyramid in an inverted position (the 1 cm base resting on the glass) right in the center of the four images that appear on the screen. When you look straight through the plastic, you’ll see how the images merge in the center of the air creating the illusion of a 3D object.
Additional tips to improve the outcome
If you notice the image looks double, try using a thinner plastic. The thinner the material, the less refraction there will be between the inner and outer surfaces. Also, if you paint the cut edges of the plastic with a black permanent marker, you’ll make the structure almost invisible in the dark, making the effect much more realistic.
Tools:
- Smartphone with internet connection to look up the test videos.
Materials: A sheet of transparent, rigid plastic (like a CD case cover or toy packaging). A sharp cutter or scissors. A millimeter ruler. Transparent adhesive tape. Paper and pen for the template.
As you can see, behind a simple piece of recycled plastic there are centuries of human thought, laser experiments, applied mathematics, and a deep understanding of how our eyes and brain interpret reality.
Next time you see an image floating, you won’t just see a magic trick, but you’ll see the dance of photons, the forty-five-degree angle, and the legacy of geniuses like Pepper or Gabor.
I hope this detailed guide has helped you get as excited about the science of light as I am. If you decide to build it, please let me know.
I’m really excited to hear if these concepts have helped make your homemade projector look much more professional. Science is everywhere, you just have to know how to look at it with a bit of curiosity.
Do you have any questions about how the waves behave or about any step of the assembly? Write to me in the comments and we’ll talk it through together!

